
Card Measurements:
Tranquil Tide base 5 1/2 x 4 1/4
Irresistibly Floral (retired) DSP layer 4 x 2 3/4
Powder Pink 3 x 3
Berry Burst 3 x 3
Lemon Lime Twist 4 x 4
Fresh Fig 2x2
Sentiment strip Whisper White 1 x 5
TIP: Use a piece of Washi tape to hold the framelit in place if your do not have the magnet base plate for your Big Shot. That is what I do. Works great and does not tear up my cardstock.

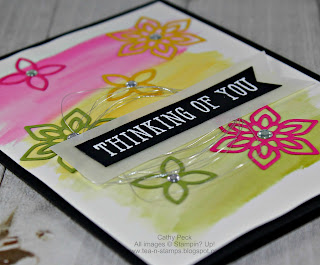
Thanks for stopping by my blog, Tea and Stamps, today. I hope you enjoyed viewing my project featuring the new 2017-2018 In-Colors. Which one is your new favorite?
Don't hesitate to contact me by leaving a comment below or e-mail at texdelch@hotmail.com if you want to learn more this project. You can also "Follow by Email" or become one of my "Followers" to keep up with my latest creations.
Product List
- Powder Pink Classic Stampin' Pad [144084] $6.50
- Powder Pink 8-1/2" X 11" Cardstock [144244] $8.00
- Tranquil Tide Classic Stampin' Pad [144085] $6.50
- Tranquil Tide 8-1/2" X 11" Cardstock [144246] $8.00
- Berry Burst Classic Stampin' Pad [144083] $6.50
- Berry Burst 8-1/2" X 11" Cardstock [144243] $8.00
- Fresh Fig Classic Stampin' Pad [144082] $6.50
- Fresh Fig 8-1/2" X 11" Cardstock [144242] $8.00
- Lemon Lime Twist Classic Stampin' Pad [144086] $6.50
- Lemon Lime Twist 8-1/2" X 11" Cardstock [144245] $8.00
- May Flowers Framelits Dies [140276] $31.00
- Falling Flowers Wood-Mount Stamp Set [139553] $28.00
- Falling Flowers Clear-Mount Stamp Set [139556] $20.00
- Window Shopping Wood-Mount Stamp Set [142920] $23.00
- Window Shopping Clear-Mount Stamp Set [143265] $18.00
- Whisper White 8-1/2" X 11" Card Stock [100730] $9.00
- Pearl Basic Jewels [144219] $5.00
- Metallic Enamel Shapes [141678] $7.00
- Stampin' Dimensionals [104430] $4.00
- Liquid Multipurpose Glue [110755] $4.00
Enjoy!!
Cathy Peck
Wichita Falls, TX
texdelch@Hotmail.com